
This is an old revision of the document!
Table of Contents
Het Symmetry Hoofdscherm
Zo ziet het hoofdscherm eruit wanneer u een nieuwe job hebt geopend:

Laten we een keer een gedetailleerde blik werpen naar de verschillende onderdelen van dit scherm. We beginnen bij het bovenste deel van het scherm, gaan dan naar het linkerdeel en naar de onderkant van het scherm, om te eindigen bij het centrale gedeelte van het Symmetry-scherm.

Bovenste deel
Het bovenste gedeelte van uw hoofdscherm bestaat uit (van boven naar onder):
- de Titelbalk, met in de linkerhoek het Symmetry-icoon en de titel, gevolgd door de registratiestatus en de bestandsnaam van de actieve graveerjob. Wanneer u een nieuwe job heeft opgestart en nog niet heeft opgeslagen, dan zal er “Untitled.job” of eenvoudigweg “.job” staan.
In de rechterhoek van de titelbalk zal u de klassieke Windows iconen terugvinden , die u de mogelijkheid bieden om het Symmetry-scherm te minimaliseren
  , te maximaliseren
  of de schermafmeting aanpassen, en om het actieve scherm en tegelijk het Symmetry-programma af te sluiten
  .
. - de Menubalk, die 9 verschillende menukeuzes bevat – waar we later nog in detail op terugkomen – en aan de linkerzijde, informatie over de actieve job (ook wanneer die op dit ogenblik nog leeg is).
- de derde rij bevat de Iconenbalk met een reeks kleine iconen, gegroepeerd staan in drie reeksjes.
- de eerste reeks
 zijn snelkoppelingen naar menukeuzes die ook toegankelijk zijn via de menubalk. We overlopen ze van links naar rechts:
 - “Nieuwe job”,
 - “Open Job”,
 - “Bewaar Job”,
 - “Job Uitvoeren”,
 - “Kopieer huidige regel”, en
- De betekenis (“naam” of “tooltip”, zo u wil) van elk van die iconen zal ook verschijnen wanneer je met de muisaanwijzer over elk icoon beweegt.
In deze handleiding kan je meer te weten komen over elke functie door op de bovenstaande namen te klikken. - een tweede groep met kleine iconen

- begint met een pijltje zoals dat van een muiscursor [AFB] en laat de gebruiker toe om de volledige tekst van een tekstregel in uw graveerjob te selecteren;
- de drie kleine vergrootglaasjes laten u toe om terug te keren naar uw “Vorige Zoom Instelling”
 , u kan ook Inzoomen
  , of Uitzoomen
- een derde groep omvat het maatlat-icoon
 (“Afstand tussen twee punten”) en het “Verschuif naar voor” icoon
  .
.


Linkerdeel: de balk met Snelkoppelingen
Het linkerdeel van uw scherm bevat zeven ietwat grotere iconen. 
 Zoals met de vorige iconen zijn ook deze snelkoppelingen naar functies die eveneens toegankelijk zijn via het menusysteem. De namen vnan de verschillende iconen worden getoond wanneer u met uw muiscursor over het icoon beweegt.
U zal ook zien dat de reeks icoontjes verschillend is wanneer een plaat geselecteerd is ten opzichte van de iconen wanneer één enkele tekstregel geselecteerd is.
De snelkoppelingen voor een volledige plaat zijn:


Voor een individuele tekstregel zijn de snelkoppelingen de volgende:


Bottom part

The bottom part of the main screen contains data about the active job and line. The relevant parameters carry a white background. You can click on them and enter any acceptable value at any time, or, for the font style, you can click on the arrow to open the drop-down menu.
The above screenshot is also showing some parameters that are greyed out, which means that at this stage they are not accessible.
▪ Plate Dimensions
- Width

- Height

▪ Text Position Anchors
The so-called “Anchors” for the position of a line of text are the reference points, 9 in total, which determine the exact position of each text line. There are three types of anchors: the center point anchor, the four corner anchors, and the four side anchors.
 For the sake of clarity, image we have a 60 mm wide text line, height 20 mm, with a center point at 50 mm (being the horizontal position, measured from the left) and 25 mm (being the vertical position, measured from the top). This will give us the following values for the anchor points:
- the Center point anchor: x = 50.00 mm, y = 25 mm
- the four Corner anchors:
- top left: x = 20.00 mm, y = 14 mm
- top right: x = 80.00 mm, y = 14 mm
- bottom left: x = 20.00 mm, y = 36 mm
- bottom right: x = 80.00 mm, y = 36 mm
- and the four Side anchors.
- top: x = 50.00 mm, y = 14 mm
- bottom: x = 50.00 mm, y = 36 mm
- left: x = 20.00 mm, y = 25 mm
- right: x = 80.00 mm, y = 25 mm
Notes
There is no way to change the x or y value for any single anchor point: by manually changing the position of any of these anchor points, be it the x or the y value, all other values will automatically be adapted accordingly.
- For all top anchor points, the y value will always be the same (14 mm). The same goes for the bottom anchor points (y = 36 mm), as well as for the centerpoint and left and right side anchors (y = 25 mm).
- Similarly, the x axis values will be identical for the top and bottom left anchors (x = 20 mm), for the top and bottom right anchors (x = 80 mm), and for centerpoint and top and bottom side anchors (x = 50 mm).
▪ Font style, height and alignment

- Font style
 (drop down menu)
 - Font alignment: three icons
 , representing Left AFB., Center AFB. and Right AFB. alignment. By clicking either one, the other two or greyed out.
 - Font height
- Font colour


▪ Line margins, italics and condensing properties

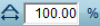 - Character Condensation : Allows you to narrow or widen a text line. For more detailed information, please refer to the condense mode page.
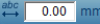 - Length of text on this line : When you modify the text length manually, the character and space condensation will be modified in order to fit the required length.
Please note, however, that once the text length is changed manually, the only way to make another change is manually. Changing the character condensation will modify the space condensation, and vice versa, but the line length will be left untouched.


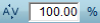 - Intercharacter space condensation: Works the same way as the character condensation, but for the spacing in between characters only.
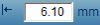 - Left margin of this line: Sets the left margin of the current text line.


 - Italicization of this line: Allows you to change the characters from upright to a certain angle. A positive value will make the text slant forwards – i.e. the italics as we know them –, a negative angle will have the text slant backards.
 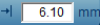 - Right margin of this line: Sets the right margin of the current text line.


