
This is an old revision of the document!
Table of Contents
L'Écran Principal
Voici l’écran principal quand vous lance Symmetry:

Regardons en détail les différentes sections de cet écran. On commencera par la partie supérieure de l’écran, pour passer à la partie de gauche, puis le fond de l’écran. On terminera par la partie centrale.

Partie supérieure
La partie supérieure de votre écran principal contient (de haut en bas):
- la Barre de titre, avec dans le coin de gauche l’icône Symmetry et le titre, suivi de l’état d’enrgistrement et le nom de fichier du travail de gravure actif. Quand vous avez lancé un nouveau travail qui n’a pas encore été sauvegardé, le nom qui est affiché sera “Untitled.job” ou tout simplement “.job”.
Dans le coin de droite de la barre de titre, vous verrez les icônes Windows traditionnelles , qui vous offrent la possibilité de minimiseren
  l’écran Symmetry, de le maximiser
  ou d’adapter la taille de la fenêtre, et pour clôturer l’écran actif et en même temps le logiciel Symmetry
  .
. - la Barre de menus, qui contient neuf options de menu différentes – que nous allons regarder de près – et sur le bord de gauche, des informations sur le travail actif (même si celui-ci est encore vide en ce moment).
- la troisième partie contient la barre des icônes avec une série limitée d’icônes, en trois groupes.
- dans le premier groupe
 il s’agit de raccourcis vers des options de menu qui sont également accessible via la système de menus. De gauche à droite il s’agit de:
 - “Nouveau travail”,
 - “Ouvrir travail”,
 - “Sauver”,
 - “Exécuter gravure”,
 - “Copier ligne actuelle”, et
- La signification (le “nom” of l’“infobulle”, si on veut) de chacune de ces icône apparaîtra également quand vous positionnez la flêche-curseur sur chacune d’elles.
Dans ce manuel, vous pouvez obtenir plus d’informations sur chaque fonction en cliquant sur l’un des noms ci-dessus. - un deuxième groupe de petites icônes
- commence par une flêche similaire au curseur de votre souris et permet à l’utilisateur de sélectionner le texte intégral d’une ligne de texte dans le travail de gravure;
- les trois petites loupes vous permettent de retourner vers votre “Zoom précédent”
 , d’Agrandir
  , ou de Dézoomer
- un troisième groupe consiste de l’icône-réglet
 (“Distance entre deux points”) et l’icône “Vers le haut”
  .
.


Partie de gauche: la barre à raccourcis
La partie gauche de votre écran contient sept icônes plus larges. 
 Là aussi, il s’agit de raccourcis qui sont également accessibles à travers le système des menus. Les noms des différents icônes/raccourcis sont montrés quand vous passez au-dessus avec votre curseur de souris.
Vous verrez aussi que la série d’icônes est différente si une plaque entière est sélectionné des icônes lorsqu’une ligne de texte individuelle est sélectionnée.
Les raccourcis pour une plaque entière sont:


For an individual line, the shortcuts are:


Bottom part

The bottom part of the main screen contains data about the active job and line. The relevant parameters carry a white background. You can click on them and enter any acceptable value at any time, or, for the font style, you can click on the arrow to open the drop-down menu.
The above screenshot is also showing some parameters that are greyed out, which means that at this stage they are not accessible.
▪ Plate Dimensions
- Width

- Height

▪ Text Position Anchors
The so-called “Anchors” for the position of a line of text are the reference points, 9 in total, which determine the exact position of each text line. There are three types of anchors: the center point anchor, the four corner anchors, and the four side anchors.
 For the sake of clarity, image we have a 60 mm wide text line, height 20 mm, with a center point at 50 mm (being the horizontal position, measured from the left) and 25 mm (being the vertical position, measured from the top). This will give us the following values for the anchor points:
- the Center point anchor: x = 50.00 mm, y = 25 mm
- the four Corner anchors:
- top left: x = 20.00 mm, y = 14 mm
- top right: x = 80.00 mm, y = 14 mm
- bottom left: x = 20.00 mm, y = 36 mm
- bottom right: x = 80.00 mm, y = 36 mm
- and the four Side anchors.
- top: x = 50.00 mm, y = 14 mm
- bottom: x = 50.00 mm, y = 36 mm
- left: x = 20.00 mm, y = 25 mm
- right: x = 80.00 mm, y = 25 mm
Notes
There is no way to change the x or y value for any single anchor point: by manually changing the position of any of these anchor points, be it the x or the y value, all other values will automatically be adapted accordingly.
- For all top anchor points, the y value will always be the same (14 mm). The same goes for the bottom anchor points (y = 36 mm), as well as for the centerpoint and left and right side anchors (y = 25 mm).
- Similarly, the x axis values will be identical for the top and bottom left anchors (x = 20 mm), for the top and bottom right anchors (x = 80 mm), and for centerpoint and top and bottom side anchors (x = 50 mm).
▪ Font style, height and alignment

- Font style
 (drop down menu)
 - Font alignment: three icons
 , representing Left AFB., Center AFB. and Right AFB. alignment. By clicking either one, the other two or greyed out.
 - Font height
- Font colour


▪ Line margins, italics and condensing properties

 - Character Condensation : Allows you to narrow or widen a text line. For more detailed information, please refer to the condense mode page.
 - Length of text on this line : When you modify the text length manually, the character and space condensation will be modified in order to fit the required length.
Please note, however, that once the text length is changed manually, the only way to make another change is manually. Changing the character condensation will modify the space condensation, and vice versa, but the line length will be left untouched.


 - Intercharacter space condensation: Works the same way as the character condensation, but for the spacing in between characters only.
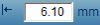 - Left margin of this line: Sets the left margin of the current text line.


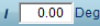 - Italicization of this line: Allows you to change the characters from upright to a certain angle. A positive value will make the text slant forwards – i.e. the italics as we know them –, a negative angle will have the text slant backards.
 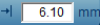 - Right margin of this line: Sets the right margin of the current text line.


